This post is in continuation to: Authentication Infrastructure – Using Ory Stack (Ory Kratos, Ory Hydra) – NeutronX Innovation Blog
Alright, so now let’s move to next step i.e.:
- Ready My Hardware
- Install necessary tools
- Exposing it to Internet
1. Ready my Hardware
The hardware I used is as mentioned below:
- Raspberry Pi 5
- Booting up from a SSD, 2 extra SSDs connected (Why 3? Becz I can afford :P).
- All 3 SSDs are connected using 4 Bay SSD Hat by Geekworm (Geekworm X1011)
- OS: Ubuntu 24.04.1 (Noble Numbat)
Steps I followed to get it ready:
- Install OS
- Assign static DHCP IP address
- Mount my SSDs
Install OS
So since I am using Raspberry Pi, I used Raspberry Pi 5 imager and installed Ubuntu to my small SSD. Then I connected it to my RPi and it worked flawlessly.
Assign static DHCP IP address
I connected my RPi to my network using LAN cable (recommended) and gave it static DHCP address in my router so that it’s local IP address doesn’t change.
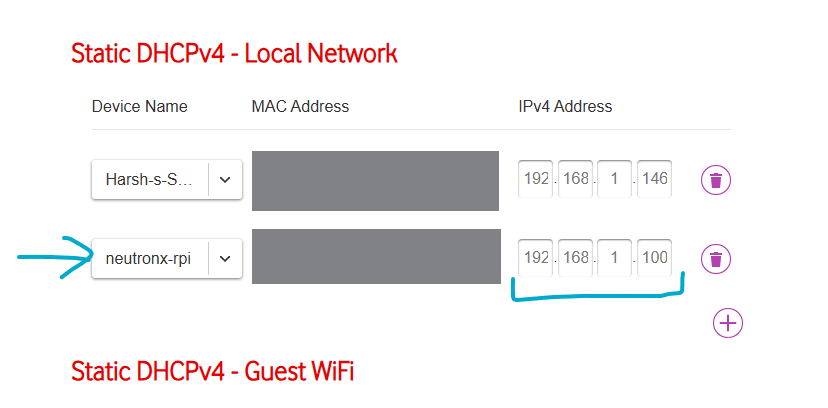
What happens with this config is that, you’re instructing your router to assign the mentioned IP address to device having this MAC Address (Simply put, every network connected device [Ethernet, Wi-Fi, and Bluetooth] has a MAC Address. If there are multiple network connections, there will be multiple MAC Addresses). If we don’t fix it like this, router assigns any IP address to your device which make things complicated sometimes. Hence, I highly recommend doing this.
Mount my SSDs (Optional)
Next step is to setup my other 2 hard drives to be recognized and mounted at some path. I choose the following:
SSD1 -> This is my boot drive. I am not touching it for anything
SSD2 -> /serverapps [I will install all my apps here]
SSD3 -> /serverstorage [This will serve as data storage option if I need anything]
For formatting my SSDs with XFS filesystem (Why XFS? Described in the article in link) and mounting them, I used this guide: How to install xfs and create xfs file system on Debian/Ubuntu Linux

2. Install Necessary Tools
- A Database (I used MySQL)
- Customize MySQL installation directory to my
/serverapps
Install MySQL
This is the most complete tutorial I found on MySQL installation on Ubuntu and I followed it: How to Install MySQL on Ubuntu 24.04
Customize MySQL installation directory (Optional)
I followed following tutorial: How To Move a MySQL Data Directory to a New Location on Ubuntu 20.04 | DigitalOcean
For me, mysql is installed under following path: /serverapps/mysql
3. Expose it to Internet
Prerequisite: You must have a static IP. Global IP address assigned to your router changes when your router restarts. Hence, you cannot point your domain to your router’s IP address reliably and static IP address is a must. Contact your ISP (Internet Service Provider) for this.
When incoming requests reach your router (Example, I am hosting an http server on a machine inside my home i.e. port 80), router has no idea what to do with it. To resolve this, most router’s admin console has some inbuilt functionality called “Port Mapping/Forwarding”. Via that, you instruct your router that whenever any request comes on a particular port, forward that traffic to a specific IP Address in your local network.
On my router, it looks like this:
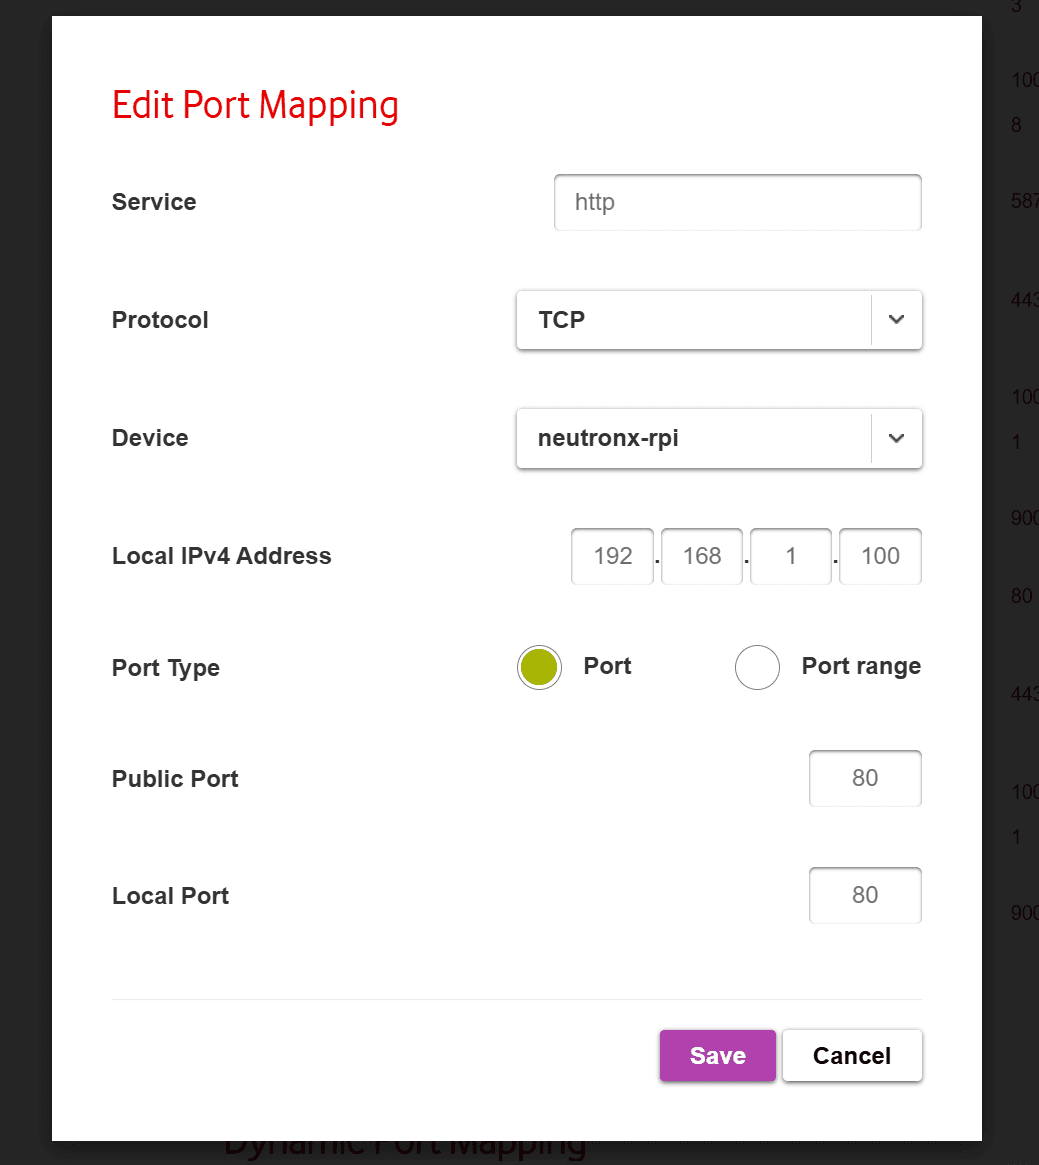
This mapping above is telling my router to forward all incoming requests on port 80 (public port) to my RPi (having local IP 192.168.1.100) on it’s port 80.
For now, port 80 is the one we require. We can add others, if necessary, later.
Next Part: Get domain name and point to your home server via Cloudflare