This article is in continuation to Install Ubuntu and expose Raspberry Pi to internet – NeutronX Innovation Blog
Since our server (Raspberry Pi) is up now, we can go ahead to the next steps:
- Get a domain name
- Add your domain to Cloudflare (Why I wonder? you will get your answer)
- Route traffic for your domain to your device in your home server (Raspberry Pi in my case)
- Add subdomain for Authentication related web pages/endpoints
Prerequisites:
- Must have static IP for your home internet connection.
- Money – to purchase your domain
Let’s get started…
1. Get a domain name
This is a fairly easy process. There are thousands of domain providers available. Cloudflare itself provides that service. However my personal favorite is Hostinger.com [If you redirect via this link and purchase a domain, I will get some commission. However it is upto you 🙂 ], I just use that to get my domains as I find it most economical, totally clutter free UI experience and speedy support.
After you get your domain, the next thing you want to do is create a Cloudflare account (If you’re not using Cloudflare itself for domain name). You must be wondering why Cloudflare? Well, in short, at this point of time, 20.5% of global web traffic is handled by Cloudflare. They’re pretty good at their job and provide all basic services totally free of cost (Ex: caching, DDoS prevention, CDNs etc.). Therefore it is a no-brainer for me personally.
I will mention here the process I followed to add my domain purchased from Hostinger to Cloudflare. If you purchased it from Cloudflare itself, you can skip the Step 1 below and move to Step 2.
Step 1: Add your domain to Cloudflare
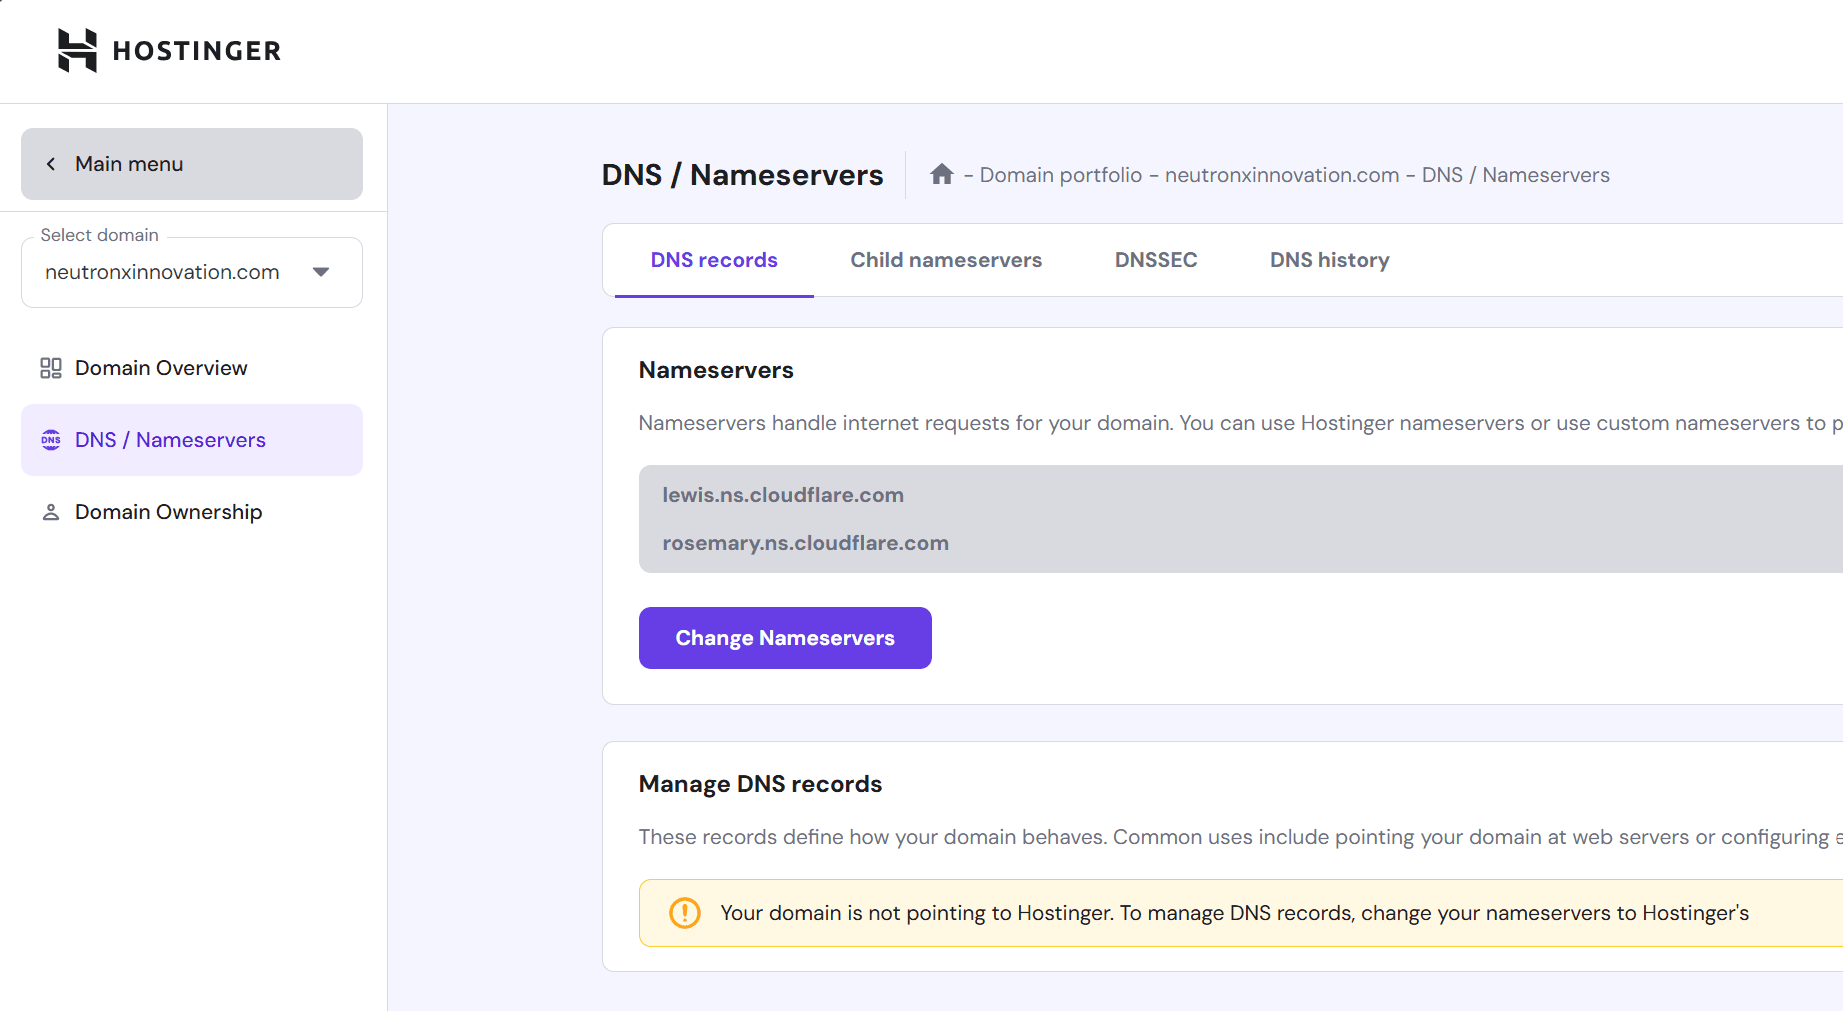
Every domain provider will have a page where you configure nameservers for the domain.
In short, from Wikipedia definition, “Nameservers are servers in the DNS which link your domain name to some IP address where your files/website are hosted.
Every domain provider will by default have their name servers. Also, they will have a page in admin menu where you can change those nameservers. For example, the screen for Hostinger looks like the image below. Here you can see there is an option to change nameservers. Keep this screen handy as are going to utilize it.
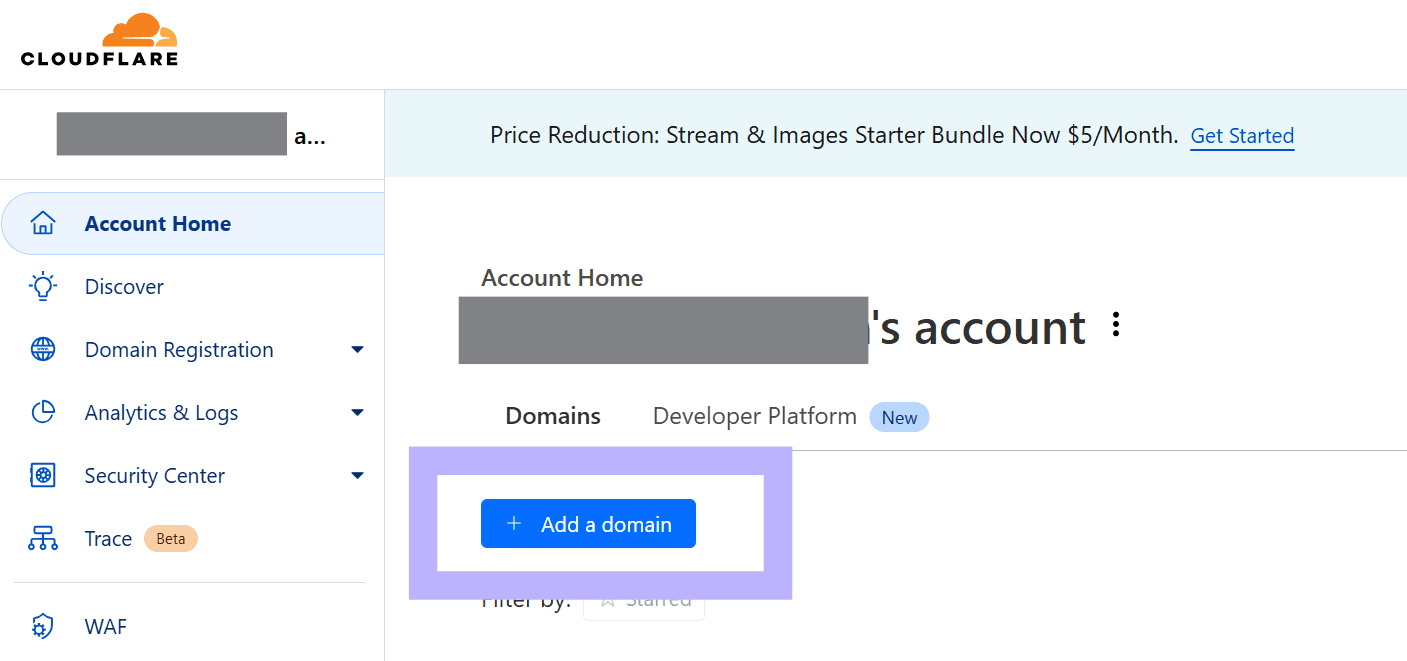
Now login to Cloudflare console, click “Add a domain” and enter your domain in next screen:
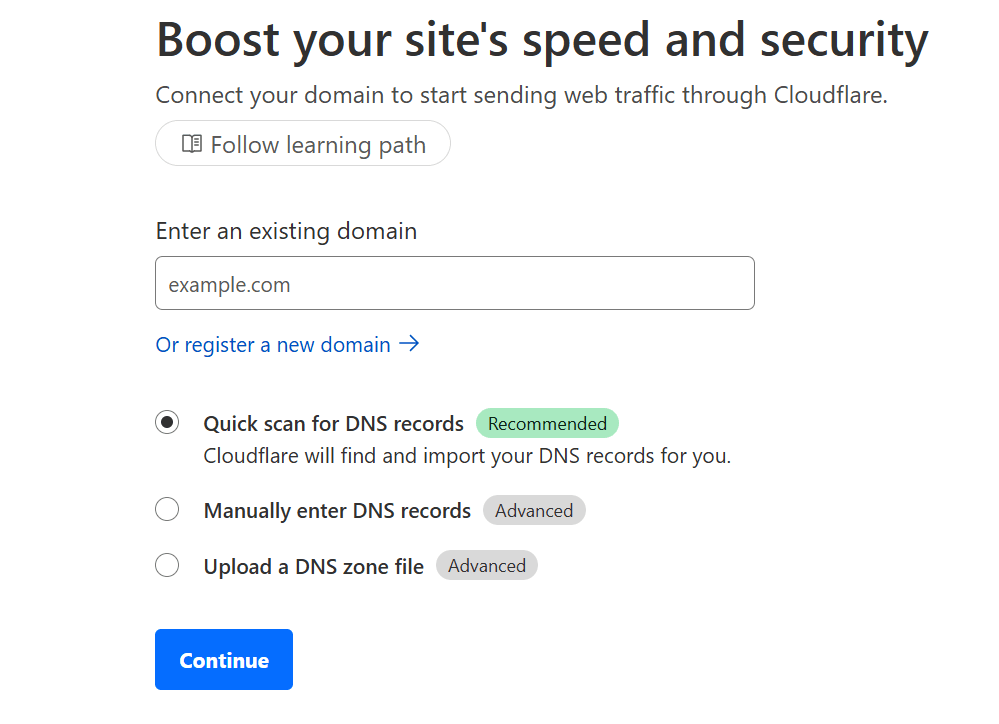
After that, select a plan. I don’t require anything else so I have selected free plan.
Now this screen is most important. Here Cloudflare will show what will be your 2 new nameservers to be changed at your domain provider’s end:

Copy these and paste it in your domain provider nameserver configuration screen. Remove any other nameservers if already present.
After this step, you just have to wait for some time. May be a day. After that, you will have your domain configured via Cloudflare.
Step 2: Point your domain name to your home’s static IP
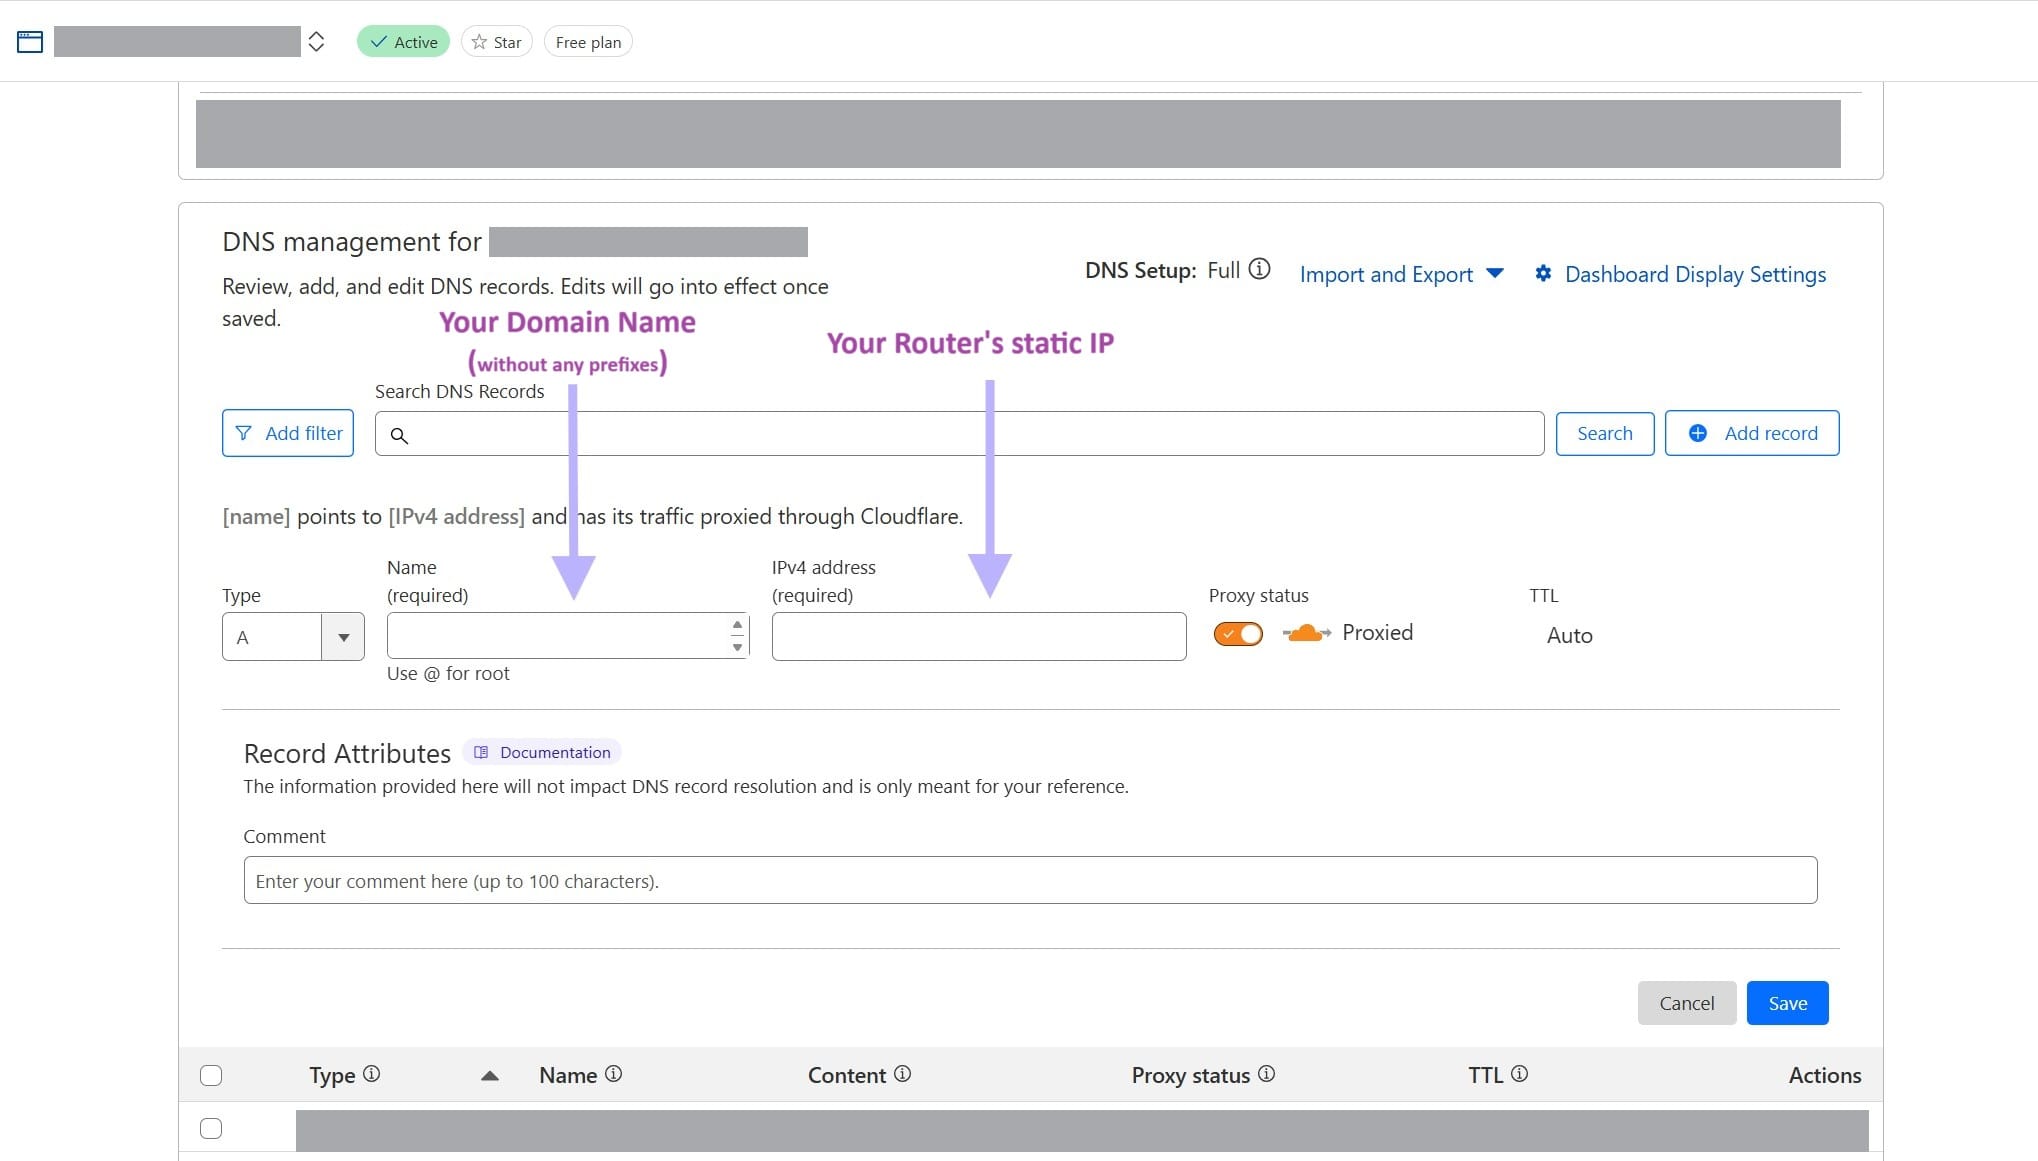
Now, you need to tell Cloudflare to router all traffic for your domain to your home’s IP address. For this, go to Cloudflare “Record” settings for your domain under DNS section:

You will get a screen showing a lot of things. Don’t get overwhelmed. We need not care about them for now. Just click on “Add record” button:

Now this is the main step. Here, enter the following:
- Type of record: A
- Name: Your domain name (Without any prefixes like http etc..). Ex: abc.com
- IPv4 Address: Your router’s static IP
Click on Save and you’re done.
That’s all.. All done.. Not that difficult ryt?
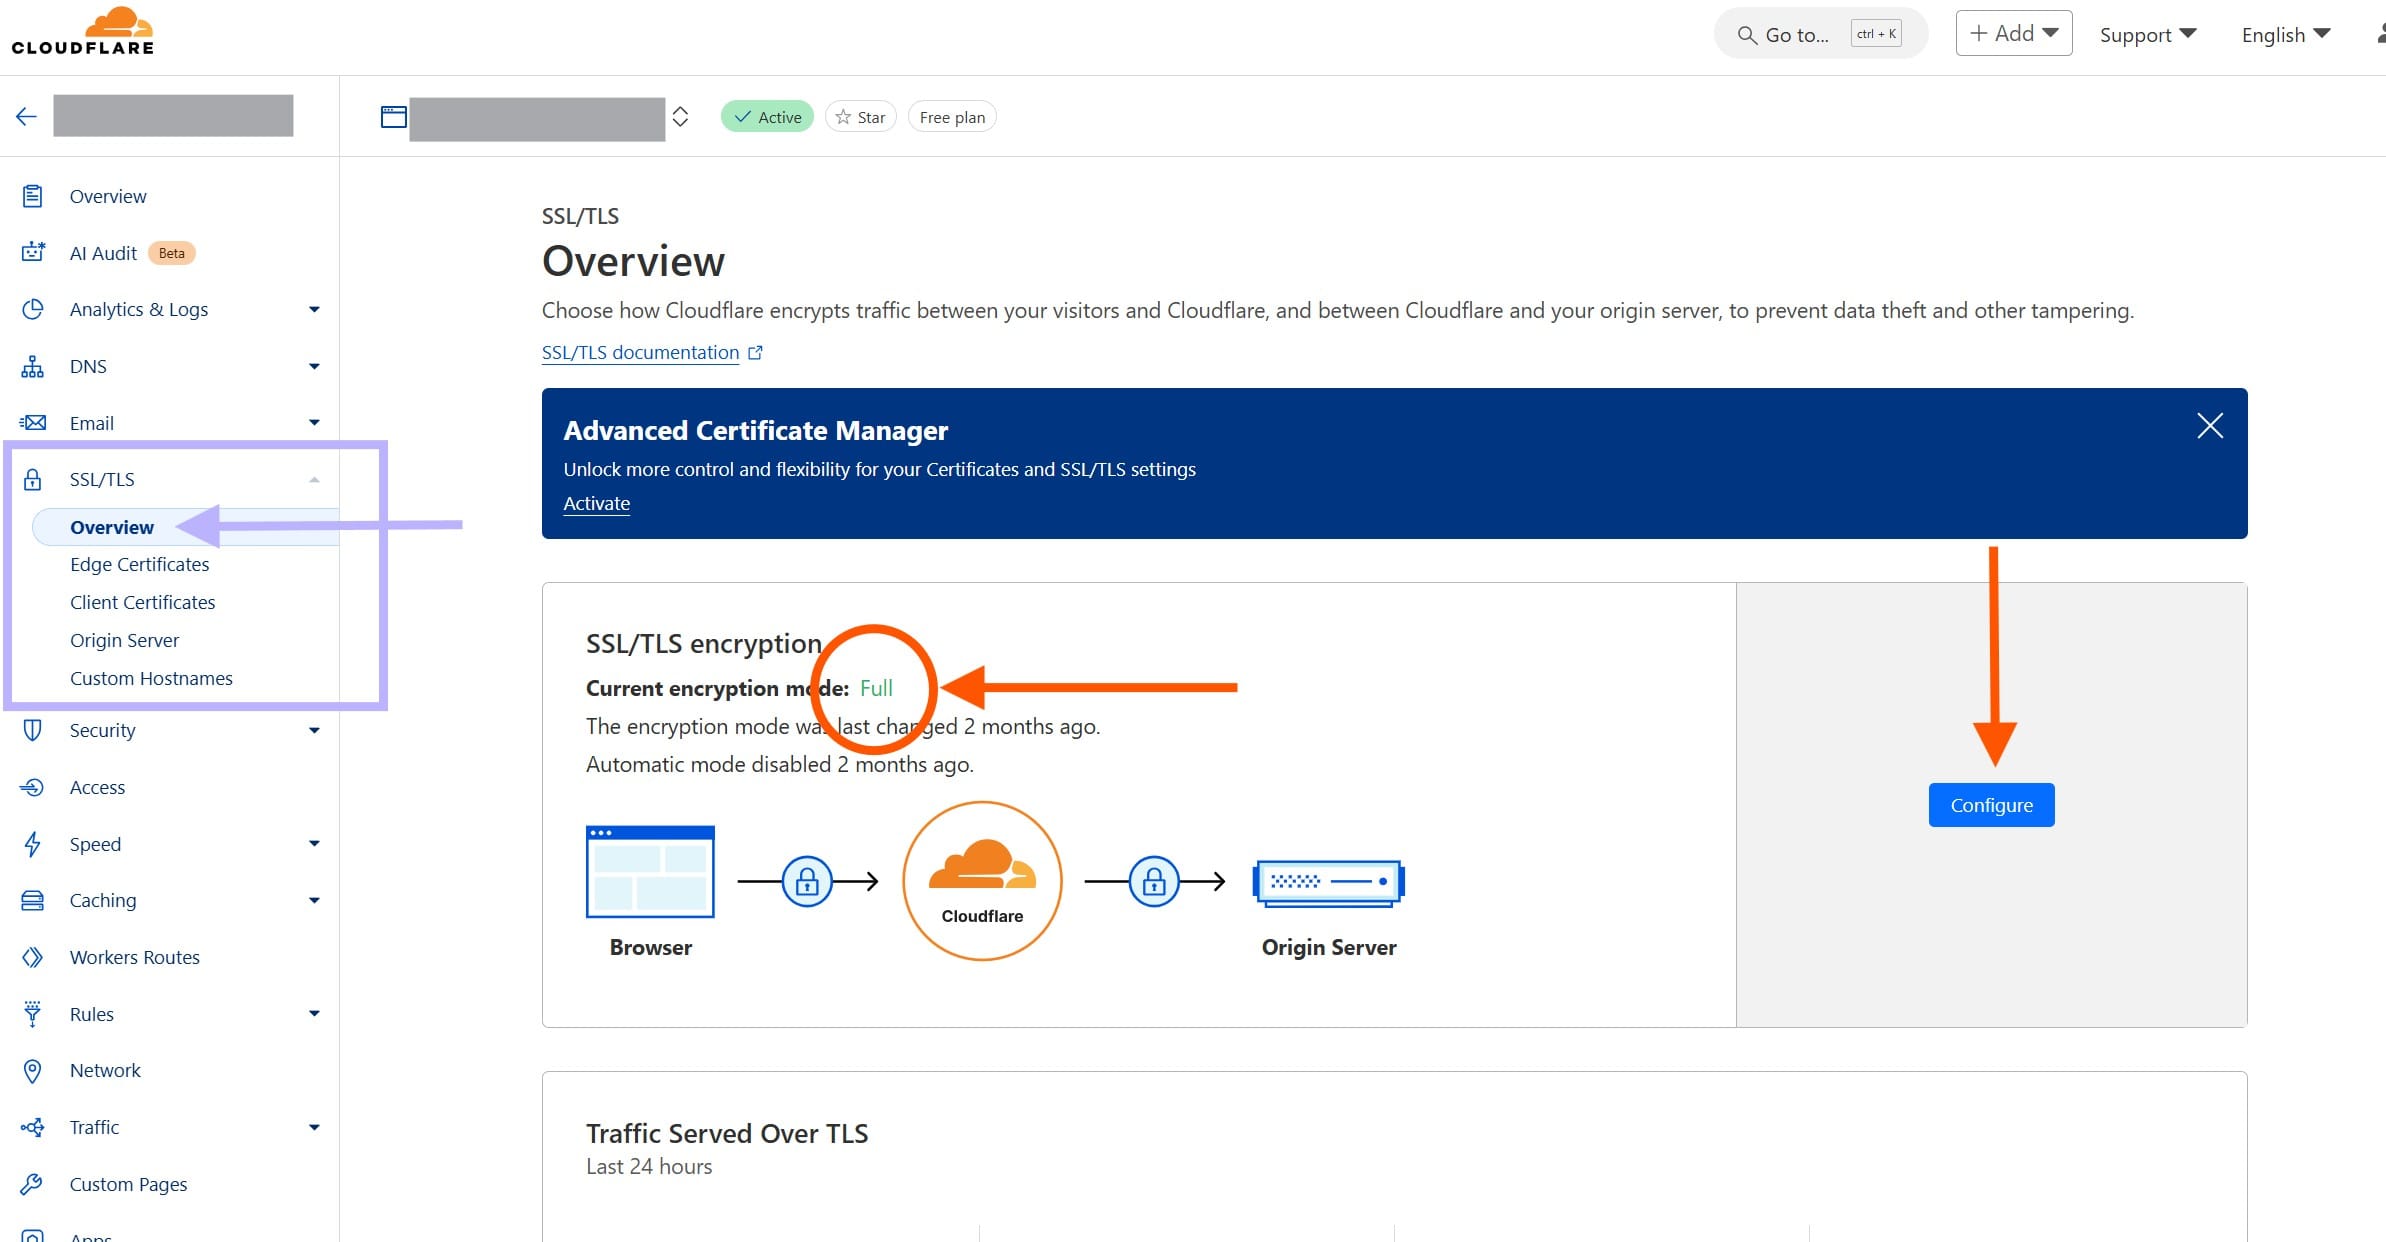
Step 3: Change encryption mode to Full under SSL/TLS section
For me, it didn’t work until I did this. I am currently not aware why we need to do this, but all I know it doesn’t work without this.
Go to SSL/TLS section and change the encryption mode to “Full” using configure button.
And with this, we’re all done!
Now we will see how can we add a subdomain for Authentication related APIs/webpages
2. Add subdomain for Authentication related web pages/endpoints
What we want is, to server all of our authentication related stuff on some subdomain ex: auth.abc.com. This will keep our web structure segregated. To do this, we will use similar Cloudflare configuration we did earlier with a slight change:
Click “Add a record”:
Now, enter following configuration:
- Type of record: A
- Name: Your sub-domain name (Without any prefixes or postfixes). Ex: auth
- IPv4 Address: Your router’s static IP
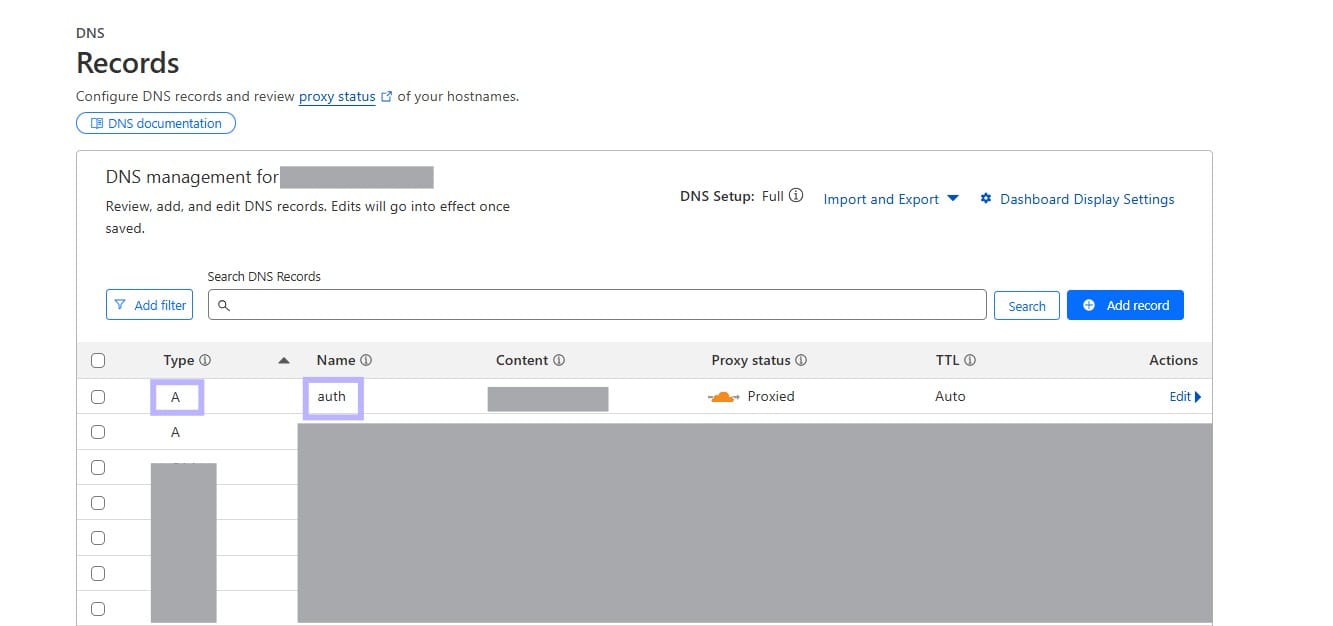
Click save and this is also done.
This marks the end of our domain and Cloudflare configuration steps.
Next step is to install nginx and configure it for our main domain and subdomain: Install nginx & route traffic for different subdomains