This article is in continuation to Install nginx & route traffic for different subdomains. This post also contains some pre-configuration for Ory Kratos to be accessible on subdomain. Therefore do read it so that you don’t get confused.
In this post, we will see how we can install and Configure Ory Kratos on our server (Raspberry Pi 5 or any). This is going to be a little lengthy process. We will do it in following steps:
- Create a schema/database in our RDBMS (I am using MySQL) for Kratos.
- Install and configure Kratos.
- Create Kratos service for autostart (systemd).
- Install and configure Kratos UI.
- Create service for autostart (systemd).
- Get the email service ready to send signup/recovery emails (I am using Mailtrap.io).
- Test everything together!
Let’s get started…
Create a schema/Database in our RDBMS for Kratos
This was straightforward. I already had installed MySQL as mentioned here: Install Ubuntu and expose Raspberry Pi to internet
I used following SQL commands:
create schema kratos collate utf8mb4_unicode_520_ci;

create user kratos
    identified by 'MyAmazinglySecurePassword';

grant all privileges on kratos.* to kratos;
Here I just created an empty schema/database named ‘kratos’ and also a user named ‘kratos’. Last command grants all privileges on that database to kratos.
Install and configure Kratos
I followed the official Kratos installation guide for most steps. You can see it here if you want: Deploy to production | Ory
But I am mentioning all steps which I followed regardless, since I am writing the article 😛
Step 1: Setup a new user for kratos in linux
Of course we would do this so that kratos runs with it’s own user privileges. As I mentioned in Install Ubuntu and expose Raspberry Pi to internet article, I am having all my apps in /serverapps/ directory. Hence I will use following directory structure to hold all auth related apps:
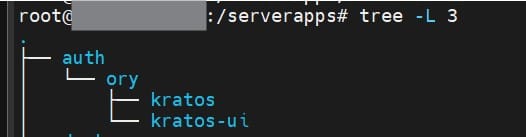
So let’s create the directory structure:
cd /serverapps
mkdir -p auth/ory
Now let’s create a new user ‘kratos’ with disabled login and assign the owner of that directory as that user itself.
This command does it in one go:
useradd -s /bin/false -m -d /serverapps/auth/ory/kratos kratos
Step 2: Create a folder for Kratos installation/config files
mkdir /serverapps/ory/kratos/{bin,config}
Step 3: Install Ory Kratos
This is straightforward as Kratos is simply just one executable. To see what is the latest version: Release v1.3.1 · ory/kratos · GitHub
Their GitHub has a pre-built binary available for each operating system:
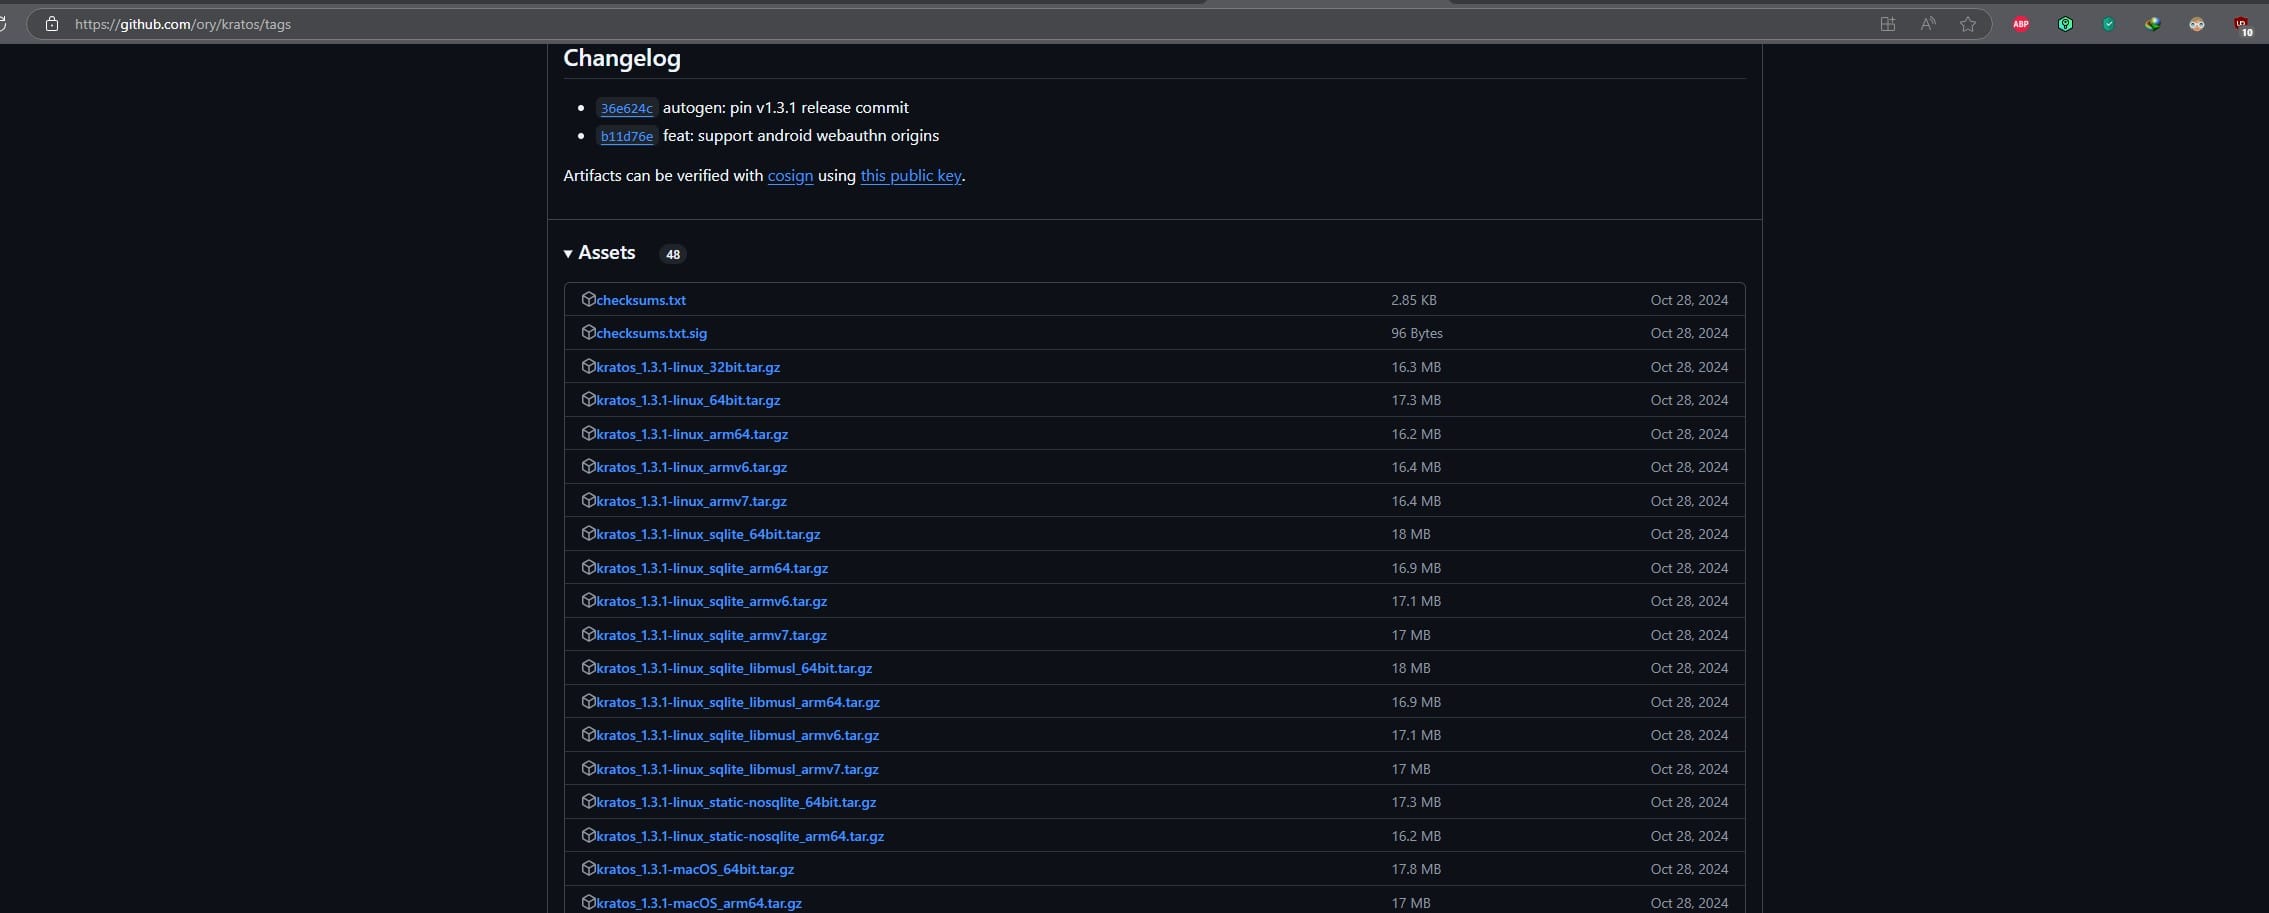
I have a Raspberry Pi and hence I am using Linux arm64 version.
cd /serverapps/auth/ory/kratos/bin

# Download
wget https://github.com/ory/kratos/releases/download/v1.3.1/kratos_1.3.1-linux_arm64.tar.gz

# Extract
tar xfvz kratos_1.3.1-linux_64bit.tar.gz

# Remove redundant files
rm kratos_1.3.1-linux_64bit.tar.gz
rm *md
rm LICENSE
Step 4: Download pre-built config files
Now we will download pre-built config files for Kratos under config directory.
cd ../config

wget https://raw.githubusercontent.com/ory/kratos/v1.3.1/contrib/quickstart/kratos/email-password/identity.schema.json

wget https://raw.githubusercontent.com/ory/kratos/v1.3.1/contrib/quickstart/kratos/email-password/kratos.yml
- kratos.yml: This is the main configuration file for Kratos.
- identity.schema.json: This is default identity schema. In that we define the user identity fields and authentication related fields as well.
Step 5: Configuring kratos.yml
Replace kratos.yml with these contents. Replace neutronxinnovation.com with the domain which you bought and for which we did the nginx config in previous post.
Don’t worry. I will explain each step in detail.
version: v0.13.0

dsn: mysql://kratos:MyAwesomeSecurePassword@tcp(localhost:3306)/kratos?max_conns=20&max_idle_conns=4

serve:
  public:
    base_url: https://auth.neutronxinnovation.com/
    host: 127.0.0.1
    cors:
      enabled: true
      allowed_origins:
        - http://localhost
        - https://localhost
        - https://neutronxinnovation.com
        - https://www.neutronxinnovation.com
        - https://auth.neutronxinnovation.com
        - https://www.auth.neutronxinnovation.com
      allowed_methods:
        - POST
        - GET
        - PUT
        - PATCH
        - DELETE
        - OPTIONS
      allowed_headers:
        - Authorization
        - Cookie
        - Content-Type
      exposed_headers:
        - Content-Type
        - Set-Cookie

  admin:
    base_url: http://127.0.0.1:4434/
    host: 127.0.0.1

session:
    cookie:
      domain: neutronxinnovation.com
      same_site: Lax
      name: wme_auth
    whoami:
      required_aal: aal1

selfservice:
  default_browser_return_url: https://auth.neutronxinnovation.com/auth/
  allowed_return_urls:
    - https://auth.neutronxinnovation.com

  methods:
    password:
      enabled: true
    lookup_secret:
      enabled: true
    link:
      enabled: true
    code:
      enabled: true

  flows:
    error:
      ui_url: https://auth.neutronxinnovation.com/auth/errors

    settings:
      ui_url: https://auth.neutronxinnovation.com/auth/settings
      privileged_session_max_age: 15m
      required_aal: highest_available

    recovery:
      enabled: true
      ui_url: https://auth.neutronxinnovation.com/auth/recovery
      use: code

    verification:
      enabled: true
      ui_url: https://auth.neutronxinnovation.com/auth/verification
      use: code
      after:
        default_browser_return_url: https://neutronxinnovation.com

    logout:
      after:
        default_browser_return_url: https://auth.neutronxinnovation.com/auth/login

    login:
      ui_url: https://auth.neutronxinnovation.com/auth/login
      lifespan: 10m

    registration:
      lifespan: 10m
      ui_url: https://auth.neutronxinnovation.com/auth/registration
      after:
        password:
          hooks:
            - hook: session
            - hook: show_verification_ui

log:
  level: trace
  format: text
  leak_sensitive_values: true

secrets:
  cookie:
    - XXXXXXXXXXXXXXXXXXXXXXXXXXXXXXXXXXXXXXXXXXXXXXXXXXXXXXXXXX
  cipher:
    - XXXXXXXXXXXXXXXXXXXXXXXXXXX

ciphers:
  algorithm: xchacha20-poly1305

hashers:
  algorithm: argon2
  argon2:
    parallelism: 1
    memory: 64MB
    iterations: 3
    salt_length: 16
    key_length: 32

identity:
  default_schema_id: user_v0
  schemas:
    - id: user_v0
      url: file:///serverapps/auth/ory/kratos/config/identity.schema.json

feature_flags:
  - use_continue_with_transitions: true
Explanations:
dsn: mysql://kratos:MyAwesomeSecurePassword@tcp(localhost:3306)/kratos?max_conns=20&max_idle_conns=4
This line above configures the connection for Kratos with our RDBMS instance. In my case, MySQL. Change it as it is for you.
serve:
  public:
    base_url: https://auth.neutronxinnovation.com/
    host: 127.0.0.1
    cors:
      enabled: true
      allowed_origins:
        - http://localhost
        - https://localhost
        - https://neutronxinnovation.com
        - https://www.neutronxinnovation.com
        - https://auth.neutronxinnovation.com
        - https://www.auth.neutronxinnovation.com
      allowed_methods:
        - POST
        - GET
        - PUT
        - PATCH
        - DELETE
        - OPTIONS
      allowed_headers:
        - Authorization
        - Cookie
        - Content-Type
      exposed_headers:
        - Content-Type
        - Set-Cookie

  admin:
    base_url: http://127.0.0.1:4434/
    host: 127.0.0.1
In this section, we’re configuring the base url (for which kratos will be served on), host (local machine ip on which it would be listening for requests) and CORS.
CORS stands for cross-origin resource sharing. In summary, let’s say we have 2 websites abc.com & xyz.com. In your browser, you visit abc.com. Let’s assume abc.com website UI is calling some API via xhr request at xyz.com’s backend. This is called a cross-origin request since the root domains involved are different.
Now by default, the browser will not directly call the xyz.com’s api and instead, it will send an OPTIONS request. xyz.com’s backend server will respond to that OPTIONS request telling that whether any other origin is allowed to call this server or not. Based on this response, the browser will decide whether it can proceed with that request. This is kind of a process by which resources should be shared when requests are cross-origin.
In the code above, we’re configuring the domains, request types and headers which are allowed for CORS requests. For admin, we don’t want it to be accessible at all from outside and hence we will only make it accessible from localhost.
session:
    cookie:
      domain: neutronxinnovation.com
      same_site: Lax
      name: wme_auth
    whoami:
      required_aal: aal1
This section above configures session & cookie policies. Modify it to strict if your require. But it is up-to you as I wanted Lax. For more info, visit: Cookie settings | Ory
selfservice:
  default_browser_return_url: https://auth.neutronxinnovation.com/auth/
  allowed_return_urls:
    - https://auth.neutronxinnovation.com

  methods:
    password:
      enabled: true
    lookup_secret:
      enabled: true
    link:
      enabled: true
    code:
      enabled: true

  flows:
    error:
      ui_url: https://auth.neutronxinnovation.com/auth/errors

    settings:
      ui_url: https://auth.neutronxinnovation.com/auth/settings
      privileged_session_max_age: 15m
      required_aal: highest_available

    recovery:
      enabled: true
      ui_url: https://auth.neutronxinnovation.com/auth/recovery
      use: code

    verification:
      enabled: true
      ui_url: https://auth.neutronxinnovation.com/auth/verification
      use: code
      after:
        default_browser_return_url: https://neutronxinnovation.com

    logout:
      after:
        default_browser_return_url: https://auth.neutronxinnovation.com/auth/login

    login:
      ui_url: https://auth.neutronxinnovation.com/auth/login
      lifespan: 10m

    registration:
      lifespan: 10m
      ui_url: https://auth.neutronxinnovation.com/auth/registration
      after:
        password:
          hooks:
            - hook: session
            - hook: show_verification_ui
In this code above, we are configuring linkage with ui as well as which auth methods are enabled:
- [Line 6 – 14] We have enabled password based auth, login link based auth and login code based auth.
- [Line 16 – 52] UI flows are configured in these lines.
- [Line 25 – 28] Here we’re configuring account recovery to be enabled (When you forget password, a code will be sent to your email).
- [Line 30 – 35] This is for a code to be sent in a verification email when a user signs up with email.
- [Line 37] Self explanatory. This tells where to redirect a user after logout.
- [Line 45-52] Here we’re configuring such that user is shown email verification ui after they sign up.
secrets:
  cookie:
    - XXXXXXXXXXXXXXXXXXXXXXXXXXXXXXXXXXXXXXXXXXXXXXXXXXXXXXXXXX
  cipher:
    - XXXXXXXXXXXXXXXXXXXXXXXXXXX

ciphers:
  algorithm: xchacha20-poly1305

hashers:
  algorithm: argon2
  argon2:
    parallelism: 1
    memory: 64MB
    iterations: 3
    salt_length: 16
    key_length: 32
In this code above, we are configuring security related settings:
- [Line 1-8] Here we are configuring secrets for cookies. You can generate them using
openssl rand -hex 32where 32 is the number of digits. For cipher you can have 16.- For more information, please visit: Cipher algorithm settings | Ory
- [Line 10 – 17] This is for configuring hashing algorithm for the passwords. My favourite is argon2id as it was the winner of password hashing tournament.
- To find the values for configuration, visit: Passwords settings | Ory
identity:
  default_schema_id: user_v0
  schemas:
    - id: user_v0
      url: file:///serverapps/auth/ory/kratos/config/identity.schema.json
This is extremely important section. This is where we configure the structure of the identities (user properties) which are stored and shown on UI. Here I am providing the path of the configuration file.
default_schema_id: Value for this is upto you. Think of a scenario when you have to change something in user identity somewhere later in time. In this section, we can even provide multiple schemas but only 1 can be default.
Step 6: Configuring identity.schema.json
This is an open topic tbh. What fields you want to have. What authentication methods you want to have etc. There is a lot we can do in identity schema. Hence I will mention here what I wanted and how I configured it. If you want to learn in detail, check out the full documentation: Learn how to customize Ory identity schemas | Ory
I wanted following things:
- email-password combination for login
- 2 extra fields: Name (First name and Last name) and Phone number.
Here is my identity schema:
{
  "$id": "https://schemas.ory.sh/presets/kratos/quickstart/email-password/identity.schema.json",
  "$schema": "http://json-schema.org/draft-07/schema#",
  "title": "Person",
  "type": "object",
  "properties": {
    "traits": {
      "type": "object",
      "properties": {
        "email": {
          "type": "string",
          "format": "email",
          "title": "E-Mail",
          "minLength": 3,
          "ory.sh/kratos": {
            "credentials": {
              "password": {
                "identifier": true
              }
            },
            "recovery": {
              "via": "email"
            },
            "verification": {
              "via": "email"
            }
          }
        },
        "phone": {
          "type": "string",
          "title": "Phone",
          "format": "tel"
        },
        "name": {
          "type": "object",
          "required": ["first", "last"],
          "properties": {
            "first": {
              "title": "First Name",
              "type": "string"
            },
            "last": {
              "title": "Last Name",
              "type": "string"
            }
          }
        }
      },
      "required": ["email", "name", "phone"],
      "additionalProperties": false
    }
  }
}
Most of these are self explanatory. You can read it out and understand.
Step 7: Fix all permissions on directories and files
Since we are manually creating files, we need to make sure permissions are correct.
cd /serverapps/auth/ory/

chown -r kratos:kratos kratos
This will change ownership to kratos user for kratos and all it’s child directories/files. -r is for recursive.
Migrate Kratos DB Schema
Now next step is to allow Kratos to create the necessary tables in database. Kratos binary itself does it.
/serverapps/auth/ory/kratos/bin/kratos -c /serverapps/auth/ory/kratos/config/kratos.yml migrate sql -y mysql://kratos:MyAwesomeSecurePassword\$@tcp\(localhost:3306\)/kratos
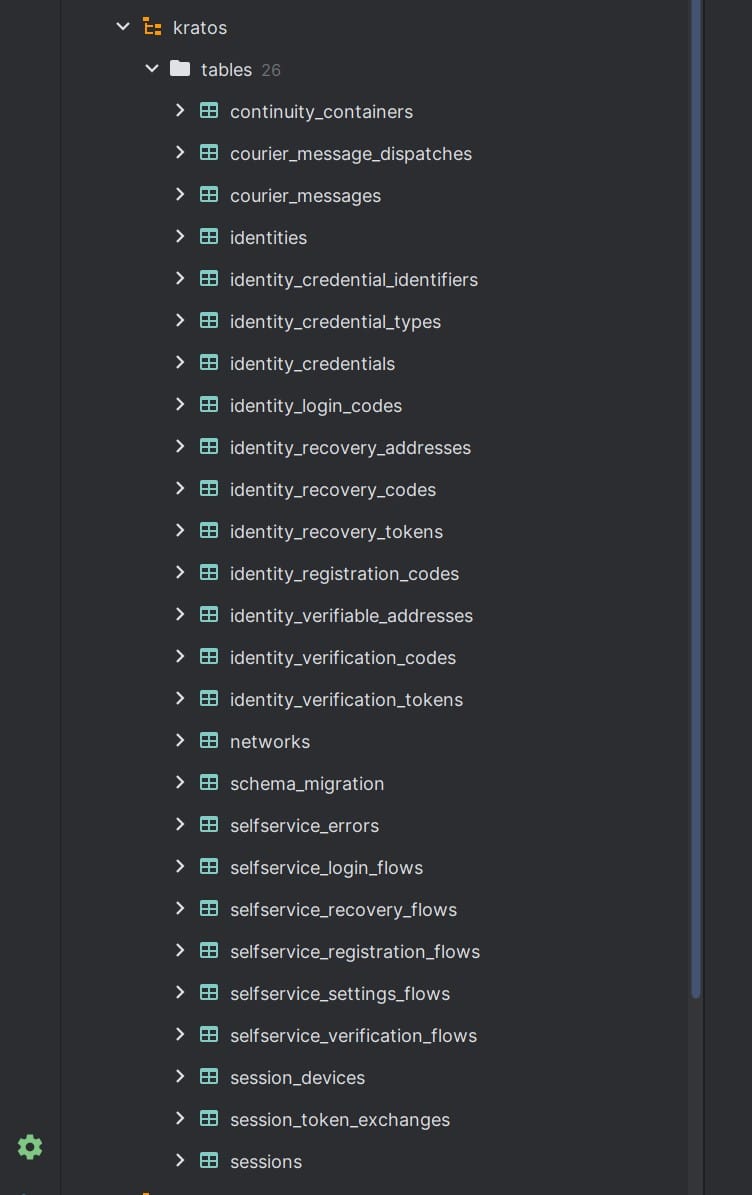
This will run the kratos sql migration and you should be able to see the tables generated in the schema we created.
Add service for kratos so that it starts automatically at system startup
cd /etc/systemd/system
nano kratos.service
Paste following content:
[Unit]
Description=Kratos Service
After=network.target
StartLimitIntervalSec=0

[Service]
WorkingDirectory=/serverapps/auth/ory/kratos/bin
Type=simple
Restart=no
User=kratos
ExecStart=/serverapps/auth/ory/kratos/bin/kratos -c /serverapps/auth/ory/kratos/config/kratos.yml serve --watch-courier

[Install]
WantedBy=multi-user.target
Then reload the systemd daemon so that it is aware that a new service has been added.
systemctl daemon-reload
systemctl enable kratos.service
With this, we’re all set with Kratos. Now let’s install the Kratos UI.
Download and Install Kratos UI
Prerequisite*: You must have installed Node already. To do that follow: How to Install Node.js on Ubuntu 24.04 – LinuxConfig. I am using Node v20.
Similar to what we did for Kratos, let’s create a new user ‘kratos-ui’ with disabled login and assign the owner of that directory as that user itself.
This command does it in one go:
useradd -s /bin/false -m -d /serverapps/auth/ory/kratos-ui kratos-ui
Now let’s download Kratos UI and move all the extracted files from subdirectory to kratos-ui directory
cd /serverapps/auth/ory/kratos-ui
wget https://github.com/ory/kratos-selfservice-ui-node/archive/refs/tags/v1.3.1.zip
unzip v1.3.1.zip
rm  v1.3.1.zip
mv kratos-selfservice-ui-node-1.3.1/ .
npm install
Since we are manually creating files, we need to make sure permissions are correct.
cd /serverapps/auth/ory

chown -r kratos-ui:kratos-ui kratos-ui
This will change ownership to kratos-ui user for kratos-ui and all it’s child directories/files. -r is for recursive.
Now let’s add service for kratos-ui so that it runs at system startup.
cd /etc/systemd/system
nano kratos-ui.service
Paste following content. Replace neutronxinnovation.com with your domain name:
[Unit]
Description=Kratos UI Service
After=network.target
StartLimitIntervalSec=0

[Service]
Type=simple
Restart=no
User=kratos-ui
ExecStart=npm start
Environment=KRATOS_PUBLIC_URL=http://127.0.0.1:4433
Environment=KRATOS_BROWSER_URL=https://auth.neutronxinnovation.com
WorkingDirectory=/serverapps/auth/ory/kratos-ui

[Install]
WantedBy=multi-user.target
Save it. Then reload the systemd daemon so that it is aware that a new service has been added.
systemctl daemon-reload
systemctl enable kratos-ui.service
With this, our kratos-ui is also done. Restart the server.
Now when you visit your auth.yourdomain.com/auth, and if you did everything right, you should be able to see the following login screen:
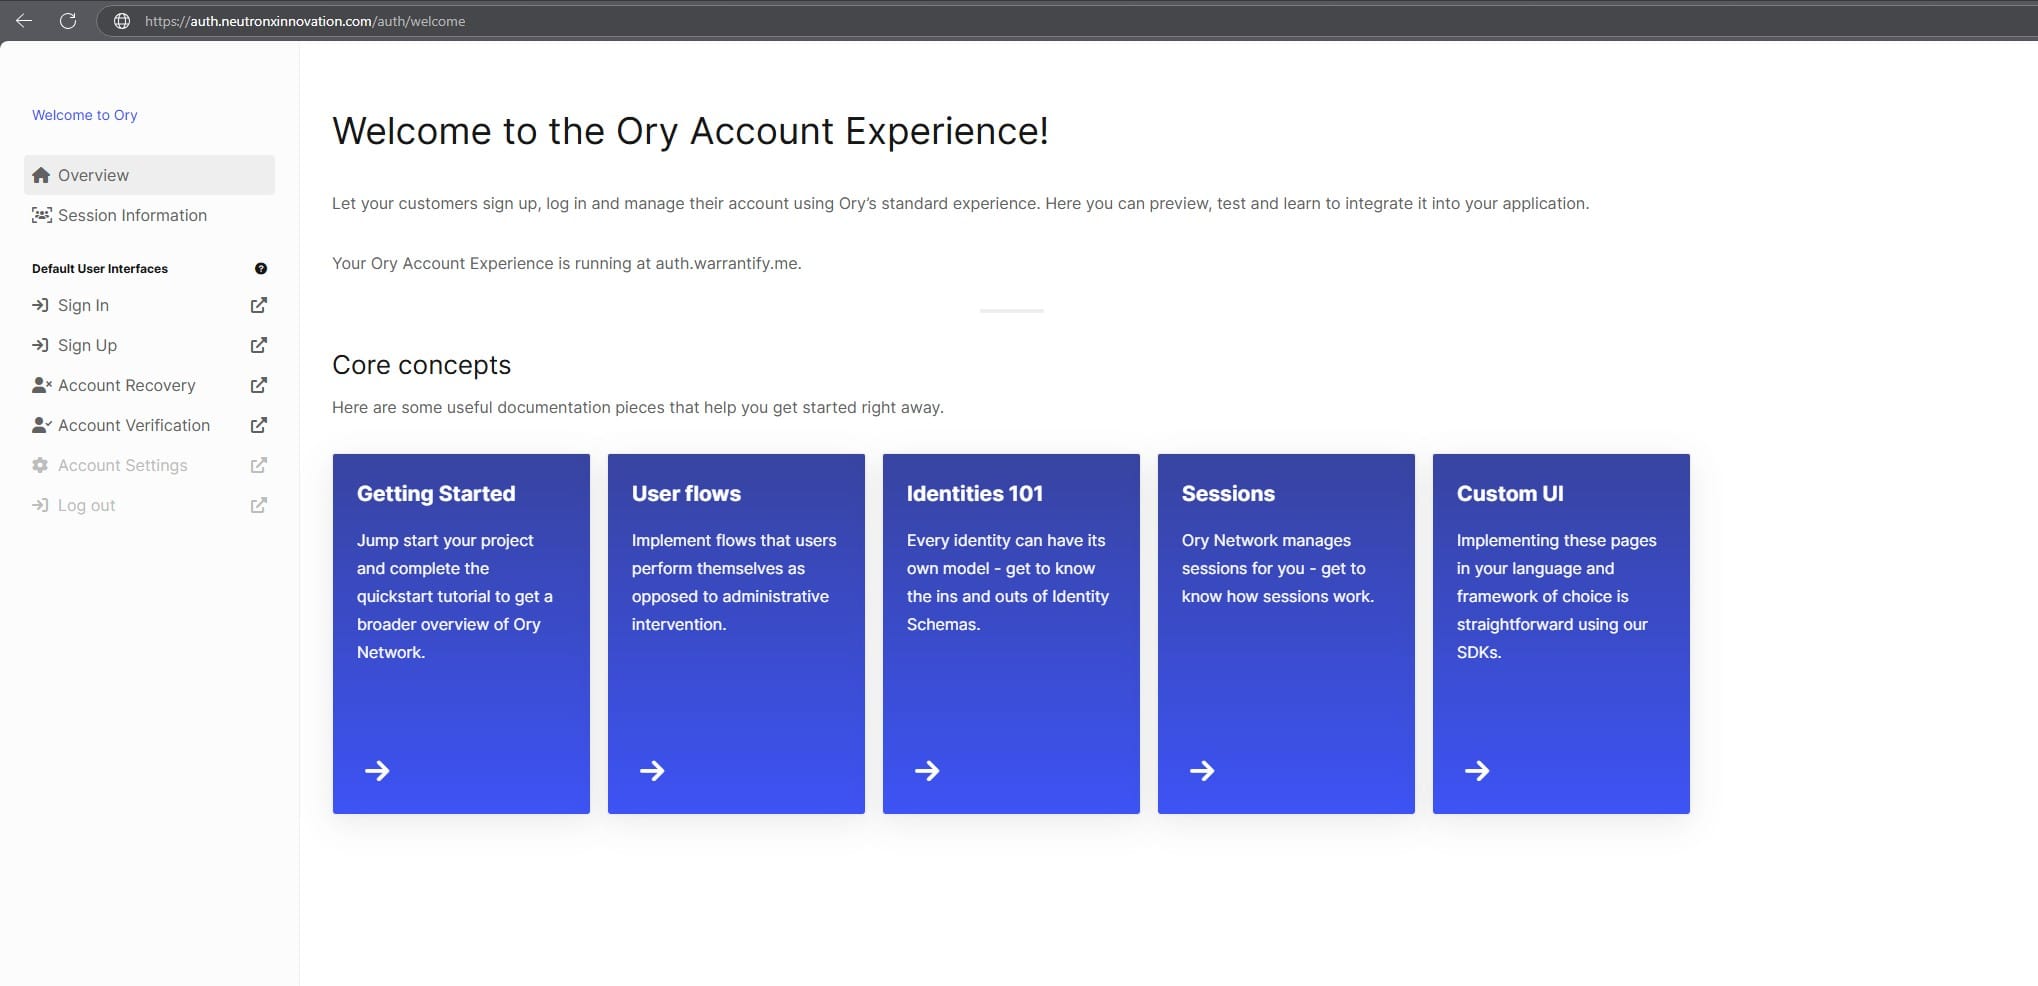
If you go to sign up page, you will see that the fields you configured in identity schema json are visible. Magic isn’t it! :
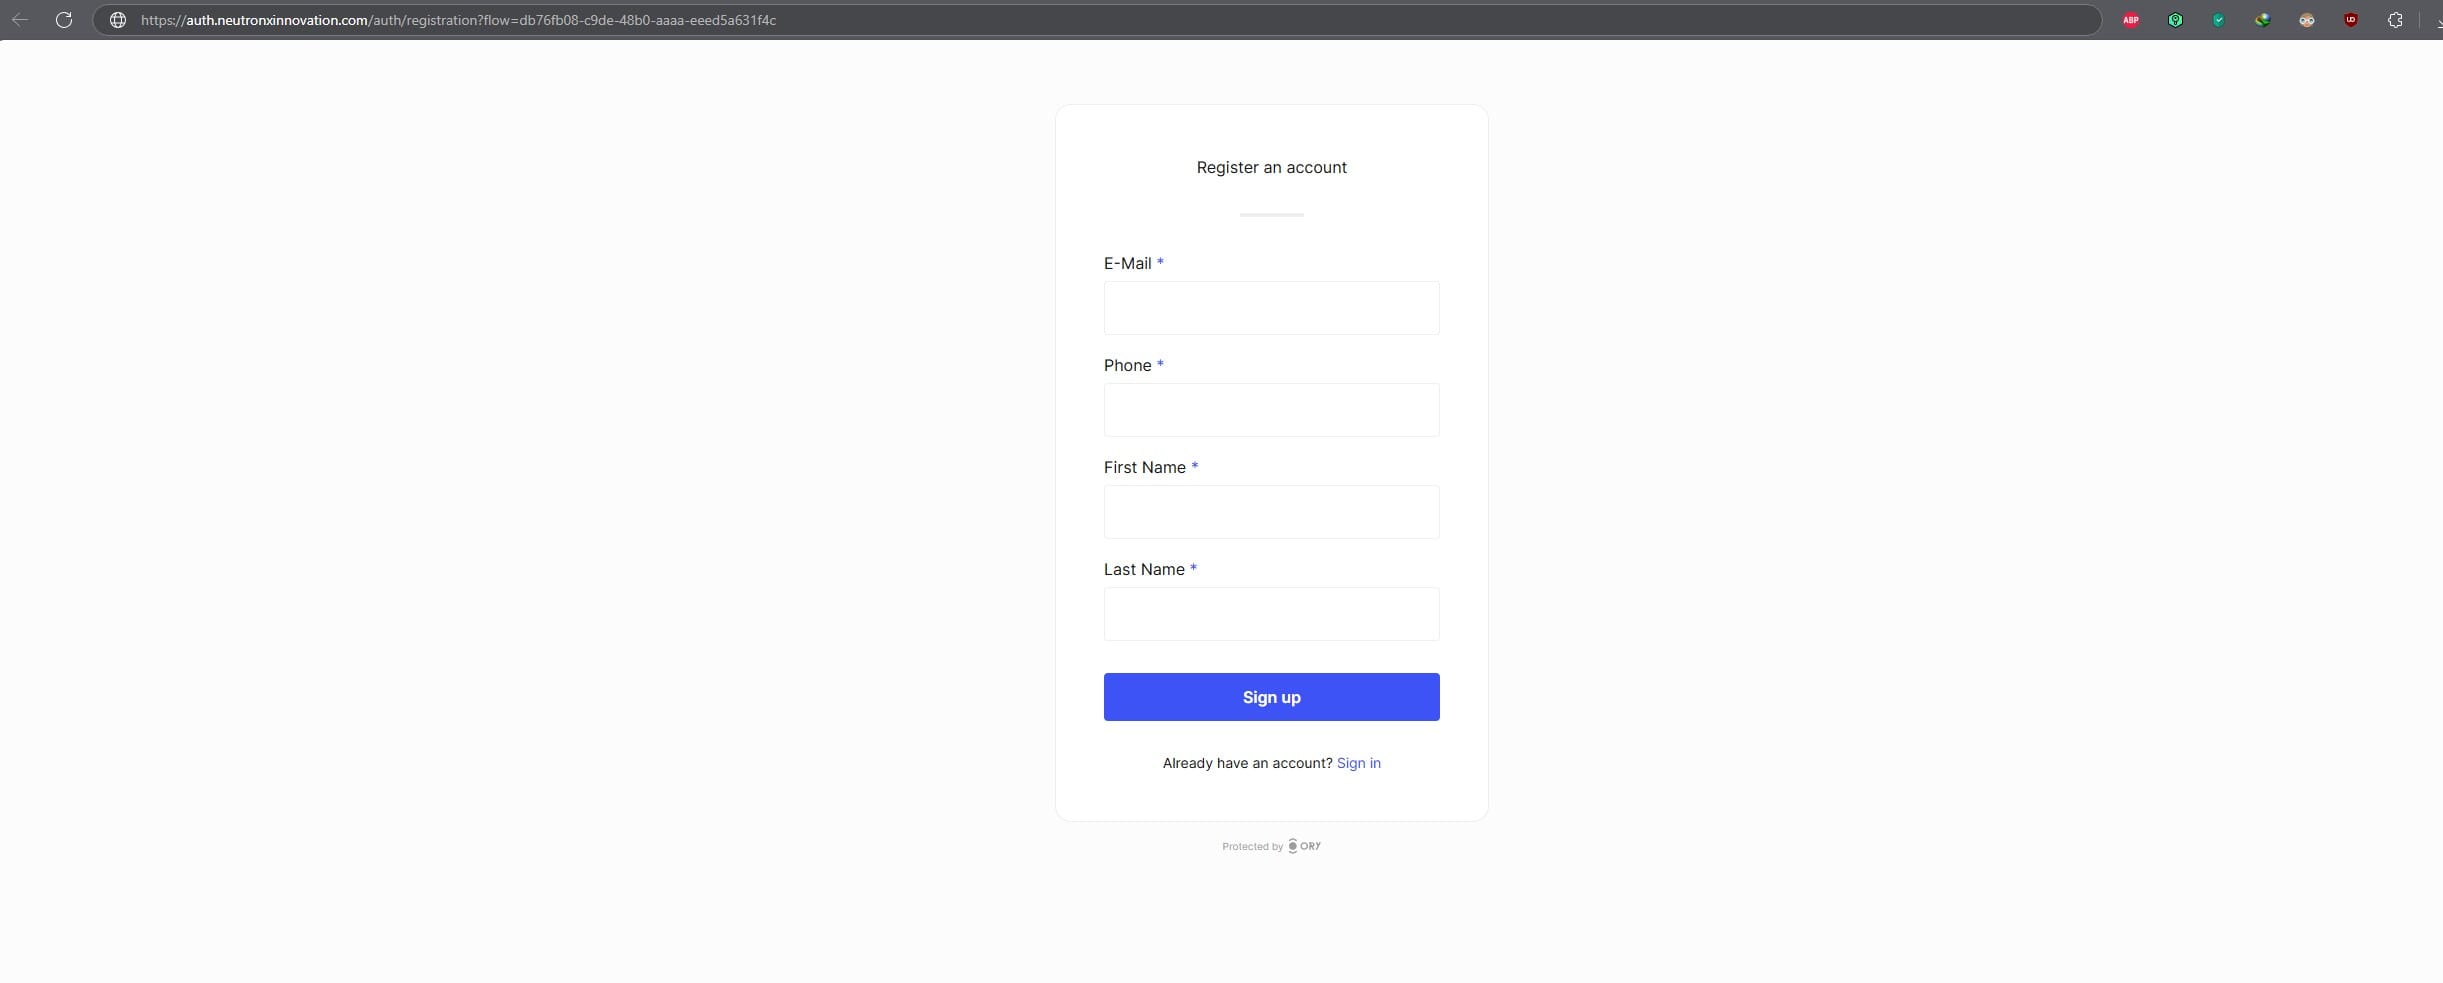
You can use the sign-up as well, but you won’t receive the verification email as we haven’t yet configured the email sending service.
Configure email service for Kratos (using Mailtrap.io)
To be honest, I was stuck at this step for 1 whole month due to a miss-configuration. I will tell you what I did which worked for me. I am using Mailtrap.io here for sending emails. It is free upto 1000 emails per month and I found it’s UX and APIs straightforward. But you can use anything you want.
Ory Kratos uses 2 methods to send email: SMTP or API. I am using API method.
Step 1: Setup MailTrap.io account and get API details
Please note I am mentioning instructions here for setting up a test email account so that you can test emails. For a real email account (which sends email to real email addresses), you have to verify your domain. The website itself has all the instructions for that.
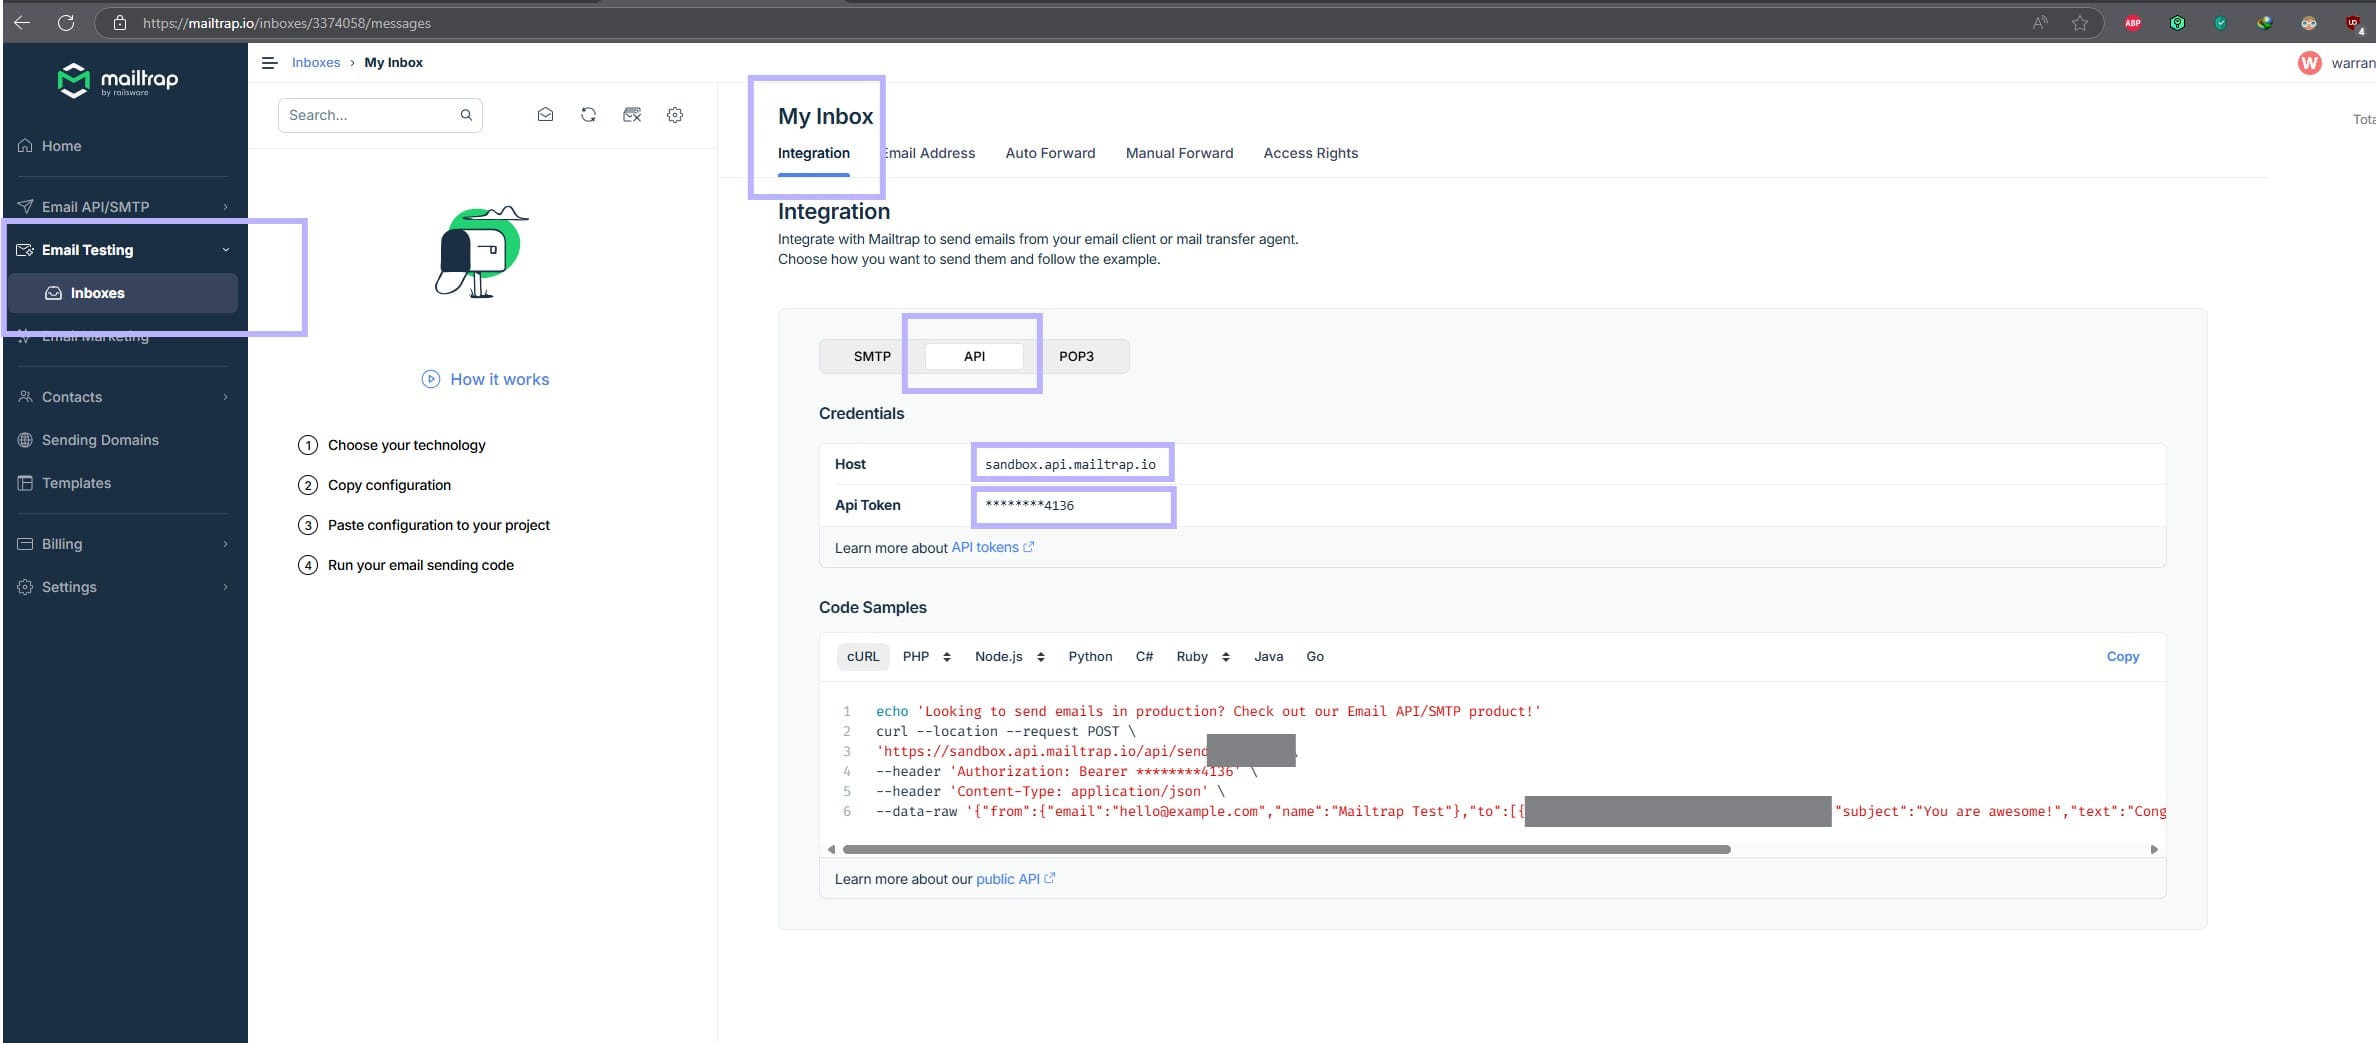
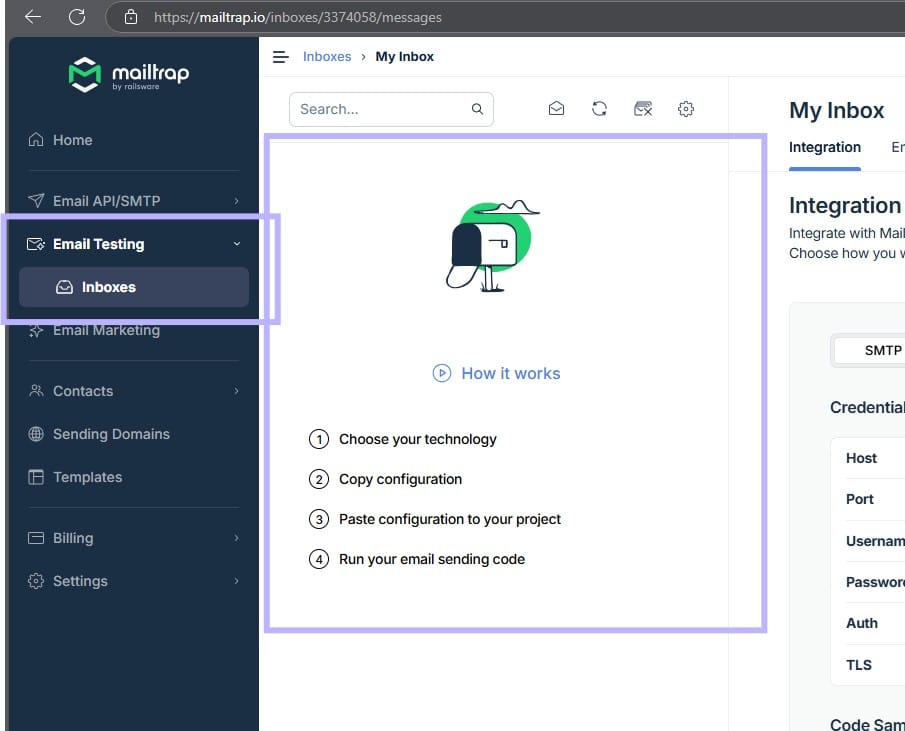
First you need to create an account. After that, when you reach the dashboard, under “Email Testing” section, you will see “Inboxes”. Click on that.
Go to Integration -> API section and copy the Host and Api-token. Keep these with you as we would need this in next steps.
Step 2: Create a mail jsoonnet file
Why this step is needed? Let me explain with an example.
Let’s say your email service provider has an api via which you can send emails. There would be fields like emailTo, emailFrom, subject, body. But now how do you tell Ory courier service that it has to call that API with request body in this format to your email provider?
Well, for this, Ory provides flexibility for you to configure a template. There we can tell Ory what request body structure it has to use to call that email API and it will fill in the details automatically in the placeholders. Let me show you how I created one for myself.
Mailtrap expects the email request to be in this format below. If you’re using any other service provider, check their documentation.
{
    "from": {
        "email": "[email protected]",
        "name": "neutronxinnovation.com"
    },
    "to": [
        {
            "email": "[email protected]"
        }
    ],
    "subject": "Please verify your email address",
    "html": "......... html email body........."
}
Now let’s create a jsonnet file so that ory can send email in this format:
Create a new file:
nano /serverapps/auth/ory/kratos/config/mailtrap.jsonnet
Paste the following contents:
function(ctx) {
  "from": {
    "email": "[email protected]",
    "name": "neutronxinnovation.com"
  },
  "to": [
    {
      "email": ctx.recipient
    }
  ],
  "subject": ctx.subject,
  "html": ctx.body
}
Save it. Now as usual, fix the permissions:
cd /serverapps/auth/ory/kratos/config
chown -r kratos:kratos mailtrap.jsonnet
Step 3: Add email configuration to kratos.yml
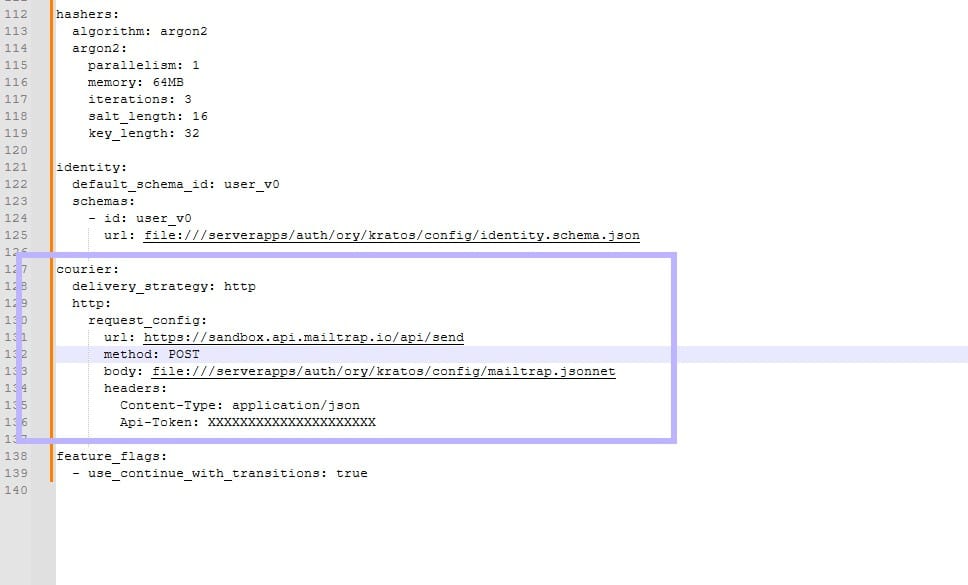
Edit the kratos.yml and paste following content after the identity section or at the end of the file. Replace the url and Api-token value with the Api-token from mailtrap which we copied earlier.
courier:
  delivery_strategy: http
  http:
    request_config:
      url: https://sandbox.api.mailtrap.io/api/send
      method: POST
      body: file:///serverapps/auth/ory/kratos/config/mailtrap.jsonnet
      headers:
        Content-Type: application/json
        Api-Token: XXXXXXXXXXXXXXXXXXXXX
Save the file. It should now look something like this:
Now restart kratos service:
systemctl restart kratos.service
Test Sign up and emails
Test the sign up now. if everything goes right, you should see the account verification email under here:
With this, we have concluded the article. Stay tuned for more…